To be able to quickly manage your clients, the necessary entries are located in the Query Actions tab, in the Client Actions group under the heading Manage Clients.

Manage Clients
Uninstall Agents
If you want to delete not only the data of the clients, but also want to uninstall the agents, you can use this feature. First make a query to list the computer in question and select it. Then click on the corresponding icon. A Wizard will open, which will ask you if the collected data in the database are also deleted or are to be retained. After clicking on Run, the agents will be deleted from the selected computers.
Push Agents
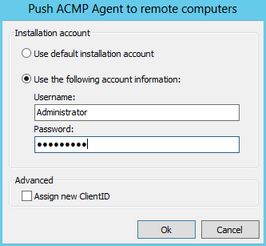
The Install Agents serves to install the ACMP Agent on your previously inventoried computers. This means that the agent can also be installed on computers which were previously only captured with OneScanClient or entered with Manual client input . You can also have a new ID assigned to the computer, in order to be able to compare the data at a later stage.

Command Client user account
Generate a list of the computers with a query and select the machine in question. We recommend to use the basic query Check ACMP Clients for this purpose. At query attribute ACMP Is Managed, you can see (value: Is Managed) whether the ACMP Agent is installed. Now click on the Install clients. In the input mask, you can select a default installation account (see in this regard Client Settings), or enter an account with installation rights. If you want to assign a new ID, select the matching checkbox. After clicking on OK, the installation starts.
With the function Force update o agent, it is possible to supply the ACMP Agents with updates or even carry out a clean installation. For this purpose you can select the computer in question in a query and click on the icon (the basic query All Clients is especially recommended for updates). Now select in the Wizard if a search for updates or a clean installation is to be performed.
Create Asset
With this function you are able to create an asset of the selected client. First select the asset type and enter a description. Additional you are able to define, if the serial number or model (if available) will be take on the asset. On the following page you are able to insert master data and financial information for the asset. Additionally you are able to link documents and create a link between clients and assets. The link to the selected client will be created automatically.
Link Asset
This function allows you to create a link between a client and a asset.
Remove Asset link
With this function you are able to remove all existing relations between clients and assets. It is not possible to specify which link will be removed.
Clear Client Command logs
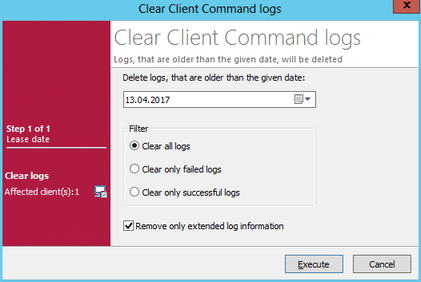
To delete the log files of the client, use the Delete script logs function. To use this function, first create a query again and select all computers concerned.

Delete Client Command logs
In the open wizard, you can also specify which logs are to be deleted as of which date. With the option Remove only extended log information, only the log details will be removed, but not the log itself. Then click on Delete script logs.
Note: |
Log files can be viewed in the details of a client (see Show Details). |
Delete clients
This feature allows you to delete the data of the clients in the database, but not to uninstall the client on the computers. This may be useful, e.g., if the data are damaged and cannot be displayed correctly anymore. To delete the data, select the computer in question in a previously formulated query and click on the matching icon. A message appears, which you have to confirm to delete the data. As soon as the client independently logs into the server, the data are newly captured. The intervals at which the client logs in, can be configured in Client Tasks.
Rescan clients
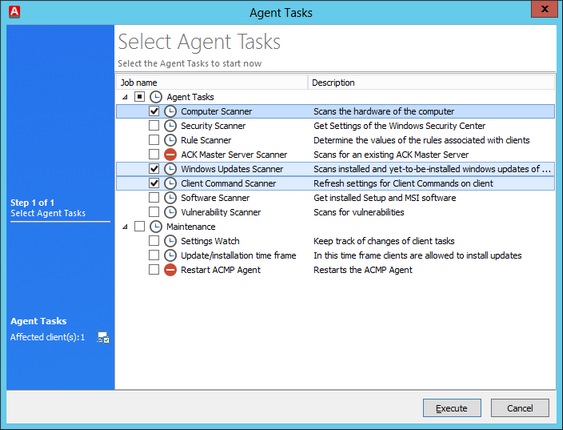
Rescan clients means the immediate execution of various client tasks. To this end, you have to select the machine in question in a query and click on the Rescan clients icon. In the now appearing wizard you can select the client tasks to be performed. These will be started after clicking on Run on the previously selected clients.

Select client task
For information about the options, see section Client Tasks.
Retire Clients
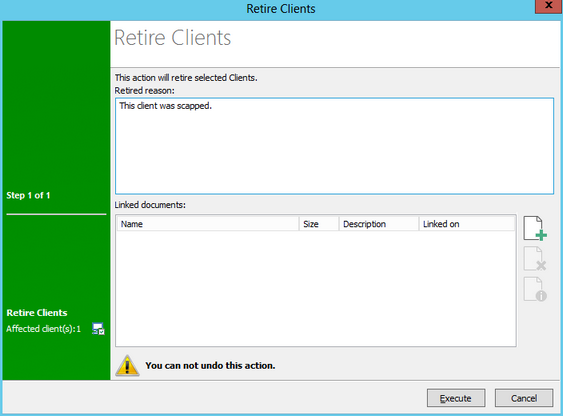
When you want to retire a client but still want to have access to attached files, linked contacts and tickets from the helpdesk you have to choose this option. The selected client will be removed from all containers after retiring and will also not be including in query results. You just need a valid license for ACMP retired Clients for every retired client. It is not possible to reactivate a retired client. You are able to enter a Retired reason and, if necessary, link documents to the retired client.

Retire a client
Link documents
This functions allows you to link documents to the client. For this it will be open a window to select the document
Assign product key
With the function Assign product key you are able to assign a product key to selected clients.
To assign a product key to more clients, select Add Clients (![]() ). Execute a query in the opening window to choose the correct client. To remove a client select Remove Clients (
). Execute a query in the opening window to choose the correct client. To remove a client select Remove Clients (![]() ).
).
Additional you can start an optionally wizard to assign all selected client a product key right before the rollout (![]() ).
).
Rollout Client(s)
To do the rollout read the corresponding Chapter.
Abort Rollout
With this function you are able to abort a started rollout for the selected clients.
Last change on 16.11.2017