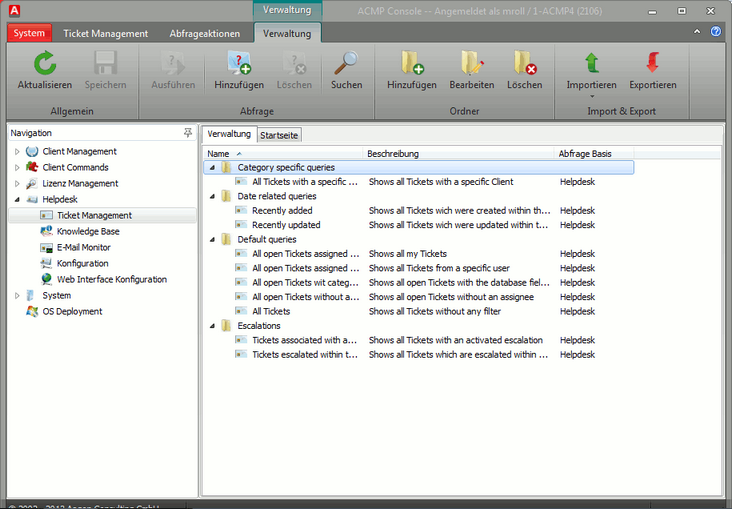
The manager serves to manage queries regarding your tickets. Here you can create, edit and run new queries. This enables you to display tickets according to specific criteria, and to process, edit or transmit them or to enter them in the Knowledge Base.

Ticket manager
Presinstalled queries are:
|
Lists all tickets that were assigned to the category Software.
|
||
|
Lists all most recently created tickets.
|
||
|
Lists all most recently modified tickets.
|
||
|
Lists all available tickets.
|
||
|
Lists all unprocessed tickets.
|
||
|
Lists all tickets that are assigned to yourself.
|
||
|
Lists all tickets which have an attachment.
|
||
|
Lists tickets that do not have an assignee. These tickets will be generated automatically only from emails. See in this regard, Email.
|
||
|
Lists all the tickets that have reached an escalation level.
|
||
|
Lists all tickets to which an active escalation definition (see Escalations) may apply one day. |
The Query Manager in the Client Manager also offers the following queries:
|
Lists all unprocessed tickets.
|
||
|
Lists all unprocessed tickets with the relevant Assigned to user staff member.
|
||
|
Lists all Helpdesk contacts that have the same email address.
|
||
|
Lists all the tickets that have reached an escalation level.
|
||
|
Lists tickets that do not have an assignee. These tickets will be generated automatically only from emails. See in this regard, Email. |
In queries, escalated tickets are shown in color.
Memory
Whenever you have changed the folder or the query, you have to save the changes. Click on the Save icon.
Add query 
If you want to create a new query, click the Add query icon.
For more information, see section Create queries.
Delete query 
To delete a query, select the query and click the Delete query icon. Confirm the safety prompt to delete the query.
Add ticket 
To create a new ticket, click on the appropriate icon. For more information, see section Working with tickets.
Add folder 
To add a folder, click the Add folder icon. First, select a folder in which the new folder is created. This icon will open a wizard in which you can enter the name of the new folder. If you do not want the new folder to be a subordinate folder, click the Add folder to root level option and click Next. In the second step, assign any icon to the folder. By means of the icons in the top bar, you can also use your own icons, rename existing icons or delete them.
*.bmp and *.ico files are supported as formats for own icons. Icons should not exceed the size of 16x16 pixels, as otherwise only a corresponding section of the original file will be used. The new icon will be integrated into the ACMP. Close the window by clicking Finish.
Edit folder 
If you would like to rename a folder, for example, click on the Edit folder icon. It opens the same window as for adding folders. The existing data are already entered and can be changed at will.
Delete folder 
Click the Delete folder icon to delete the previously selected folder including its contents. Then confirm the safety prompt.
Open ticket
If you know the ID of a given ticket, you can enter this ID directly in the input field for the quick access toolbar. In this way you can directly open the corresponding ticket.
Last change on 10.03.2014