The ACMP Package Cloud includes Client Commands that you can download and import in your ACMP Installation. Apart from Client Commands for Software installation, adjustments and uninstalling, we offer you in the Online Package Manager (OPM) under the category Premium Client Commands, Client Commands that assist you in the administration of your networks.
Client Commands from OPM
First navigate to Client Commands -> Settings and select Package Manager in the section Package Depot in the ribbon bar. A new window will open, and all the available Client Commands will be displayed.
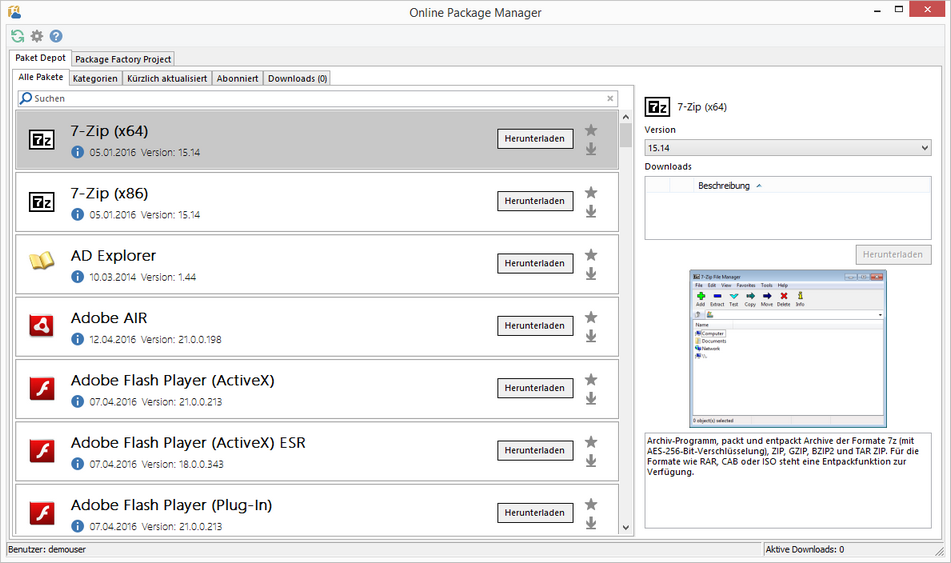
Online Package Manager
If you click Download on any of the available packages, it will be downloaded. Under the download tab, the downloads and the download statuses will be recorded and displayed. After the download is complete, an Import button will appear. Click on it to import the downloaded Client Command into ACMP.
Importation of Client Commands
After you have run the import as described above, a window will open; in which all the downloaded Client Commands will be displayed. In addition, it will be displayed whether a Client command has already been imported.
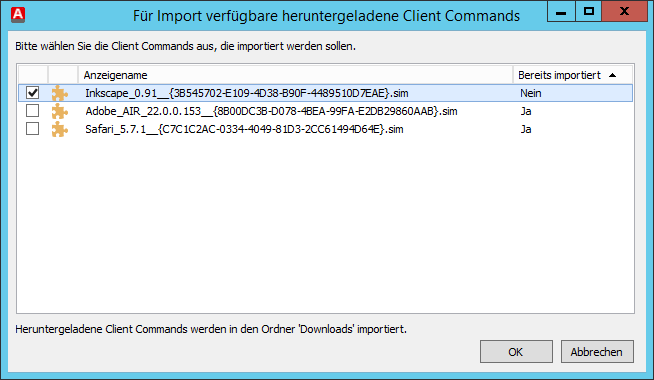
Online Package Manager
Client Commands, that have already been imported will be automatically marked for import. If you are satisfied with the selection, click OK so that the import can be started. During importation, all the downloaded Client Commands from the OPM will be filed in the Download directory. In the case that it is not existent, it will be created by the first importation. You can move the Client Commands individually.
| Client Command - Green IT |
The Client Command Green IT helps you to store the power options in individual profiles and to allocate them a container in ACMP. For Clients that are in containers, you can then set up their profiles.
After the importation of both Client Commands, switch to the Phase Creation. here, set the status of both Client Commands to enabled.
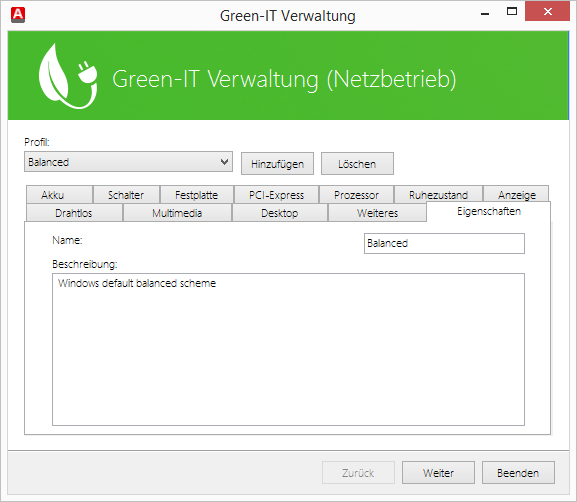
In the first step, create or edit a profile. For this, execute the Client Command Green IT administration. In this Client Command the configuration will be carried out.
Green-IT Administration (Network Operations)
To create a new power profile, click Add.
In the Name field, the description of the Power Profile can be adjusted. To edit an existing Power Profile, select it via the selection menu. Here, you will find three Windows standard schemes; Balanced, High performance and Power Saver with the individual default values. After you have selected or added a profile, the configuration for the network operators can be undergone in the individual tabs. After you have undergone all the desired settings for the network operator, click Next to reach the battery operator settings. When you have made all the settings click Next. Now you can assign the profile to a container.
Battery Tab
Control Tab
Harddisk Tab
PCI-Express Tab
Processor Tab
Sleep Mode Tab
Notification Tab
Wireless Tab
Multimedia Tab
Desktop Tab
Extras Tab
Specifications Tab
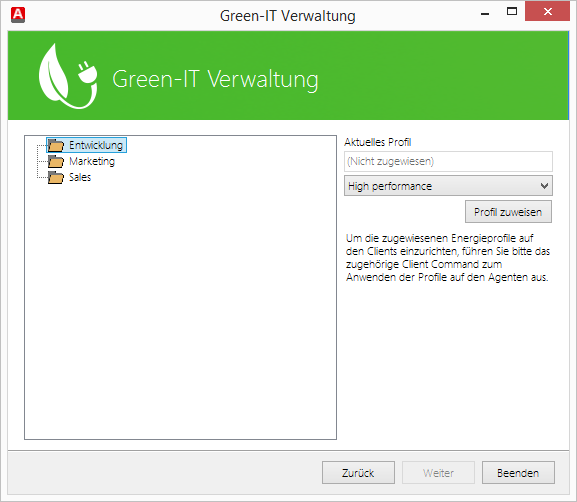
Green-IT Administration
Your container structure will be displayed to you on the left side. To assign a profile one or more contains, first select the desired container. You may select several containers by holding the CTRL key. On the right side, you can see whether a profile has already been assigned to a container via ACMP. Select the desired profile and confirm by clicking Assign Profile.
Basically, you can set up a profile on a client using three various methods.
Method 1 – Setting up the profile from the ACMP Console:
First set up a query that delivers as a result, at least the client on which you wish to set up the profile. For this the All Client query that was delivered is suitable. In the query, mark the clients that are to receive all the profile with a checkmark and click on execute Client Command in the context menu or menu bar. After you have clicked Execute, a dialogue will appear, in which you can select the profile to be set up. After you have confirmed you select with OK, (under the consideration of optional start-up conditions) the Client Command will be executed.
Method 2 - Setting up the profile with the Client Command Launcher
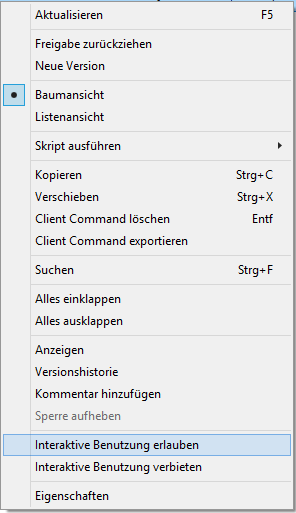
In order to set up a profile using the Client Command Launcher, you must enable the interactive use of the Client Command Apply power scheme. Select Enable Interactive use from the context menu of the Client Command.
Context menu
In the features of the Client Command, it can only be shown by the symbol (
Open the target client in the Client Command Launcher. You will find it in the task menu.
Now you can be select and execute the Client Command Apply power scheme in the Client Command Launcher. Provided the client is in a container, that has already been assigned a profile, hence, setting up this profile for the client. If the client is in a container, you will be requested to select the profile to be set up.
Method 3 – Setting up a profile via the container
Click on the Link button and select the Client Command Apply power scheme. it will appear on the right side of the dialogue window. With the confirmation button Link, the connection of the Client Command and the container will be established. Click YES in the appearing notification window to specify individual start-up conditions for the Client Command. If you click NO instead, execution time will be set to “every hour”.
The client will use the corresponding start up conditions of the selected scheme.
|
| Client Command – Warranty Information Query |
The Client Commands Get warranty information (DELL), Get warranty information (Lenovo) and Get warranty information (HP Incorporated) serves to save the warranty information of the respective manufacturer in the user defined field to each client in ACMP. Preparation
After you have imported the Client Command, the status has been created. Now open the characteristics via the context menu. The characteristics will be opened in a new window. Now select the options in the left window section. Here you can activate Quick Command display and in the Ribbon-Tab "Query Action” display. Confirm your entries with OK.
Now you can release the Client Command by opening the context menu of the client. Here, you can either select the point release Client Command or Send a Phase -> release directly. Recommended Approach Select the query action that is available to you in the entire console in the ribbon tab. To perform one off the three Client Commands, select Client Commands and select the Client Command that should be performed. If you wish to perform more than one Client Command, instead of selecting Client Command, select the point Perform Client Command in the ribbon bar. Here, you can perform various Client Commands one after another.
Open a query that has all the clients as the result set for which the Client Command to be performed. Mark the desired clients and open the context menu by a clicking the right mouse button. In the Quick Commands only select the Client Command to be performed.
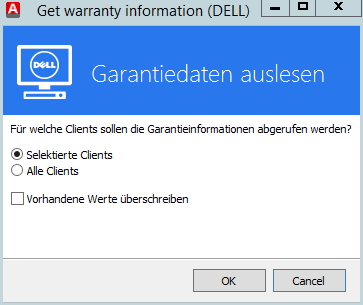
If you wish to perform more than one Client Command, instead of selecting Client Command, select the point Perform Client Command in the context menu. Here, you can perform various Client Commands one after another. In both cases a window will open; in which you can configure the performance.
Configuration Window
Provided that you have opened a query and focused a Client Command on the selected client, eave the marking on Selected Clients. However, if you wish to perform the Client Command for all the clients, mark all clients. With the Overwrite existing values checkbox you specify whether existing values should be overwritten.
|
| Windows 7 Convenience Rollup Update |
This Client Command installs the Convenience Rollup Update. The Client Command may be performed after being downloaded from the Package Cloud on all Windows 7 as well as on Windows Server 2008 R2.
The Client Command has no graphical interface and consists only of a client script.
|
Last change on 22.02.2018
