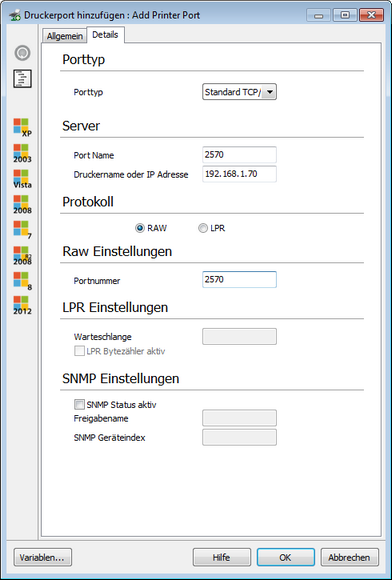
With this command you can install a printer port on a client. You can do this by selecting the port type in the Details tab. If you select local port here, the printer must be connected directly to the client. Enter the port (USB, COM3 or similar) in the input field below it.
For a network printer, select the port type standard TCP/IP Port by entering the port as well as the printer name or the IP address(es) via which the printer can be reached.
Select either RAW or LPR (Line Printer Remote) as the protocol. If you select the RAW protocol, you have to specify the appropriate port number. If the LPR protocol is selected, specify the queue and enable the LPR byte counter if necessary.
In SNMP settings, you can specify - provided the SNMP status is enabled - the use of SNMP by indicating a share name (community name) and a device index.
|
With this command you can delete a printer port on a client simply be entering the port to be deleted from the Details tab. |
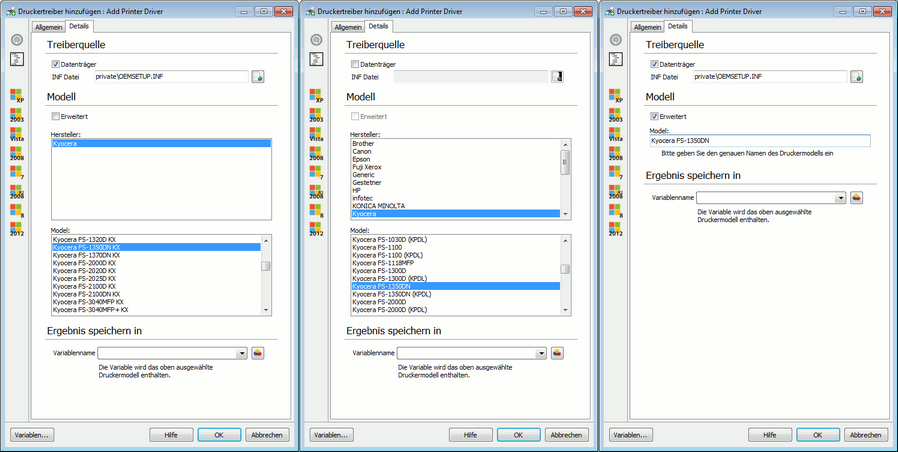
With this command, a driver can be installed for a client printer. To do so, first select a manufacturer in the Details tab. The list of models will then be updated automatically. Select the model to be installed from this list. In Save events in a variable (see Variables) where the printer model is to be saved must be specified.
Select the appropriate printer from
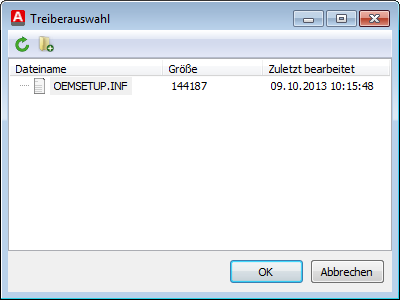
If your printer model is not listed in the list, you can load the driver from a data carrier Dazu markieren Sie die Checkbox Datenträger im Abschnitt Treiberquelle. With the driver selection button next to the input field you can select the INF file of the driver. A dialog will then open, where you can click on the Select directory button. Then the file repository to which you must have previously saved the driver opens (see File repository). Here you can select the corresponding folder and click Close. In the selection dialog, all files of the selected folder is dispayed.
INF file selection
Mark the required INF file and click the Select Inf file. You have now set the driver manually. It is also possible to enter the printer model manually. Checkmark the Advanced checkbox in the Model section and enter the model name.
|
With this command you can delete a printer driver on a client merely by specifying the printer driver to be deleted (usually the same as the printer name) in the Details tab. |
With this command you can either get or set the default printer of a client. For this function, at least one printer must be installed on the client. To get the default printer, select the Get default printer option in the Details tab and then enter a variable (see Variables) in which the corresponding printer will be stored. To set a default printer, select the option Set default printer in the Details tab, and enter the name of the default printer in the input field. |
With this command you can add a client printer by entering general information, such as printer name, location, comment and printer model, in the Details tab. This information is used for the display/identification of the printer in the printer control and in software.
In the Share tab, you can specify if other users shall also be permitted to use the printer and create a shore for it. To do so, enable the Share printer option and enter a meaningful share name in the field.
If you do not want to share the printer, leave the default option enabled.
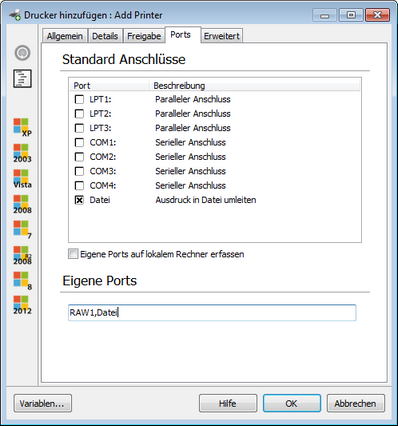
In the Ports tab you can enter the port to which the printer is connected. Mark the corresponding port in default connections. With the Include custom ports on Local machine option any other ports of the local machine are displayed, e.g., USB connections or RAW1. Of course, you can also select multiple ports, although this would make little sense. However, if this is the case, you can also enter the ports manually in the bottom input bar, separated by semicolons.
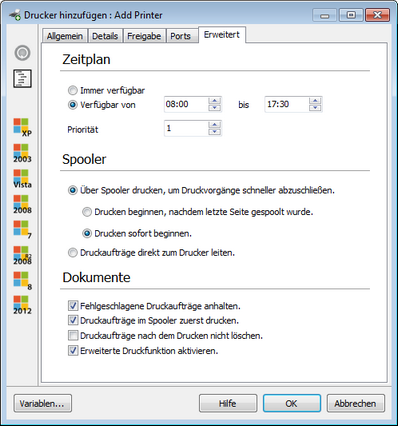
Under the Advanced tab, you can still adjust a few finer points of the printer. First, you can specify a time period in which the printer can be used (available from :) or if the printer is Always available. The priority can be specified from 1 to 99 and states with which priority the print jobs of the corresponding clients are processed, with 1 being the highest, and 99 the lowest priority.
In the Spooler range, you can define if the print jobs must run via a Spooler or can be transmitted directly to the printer.
If the print jobs must run via a Spooler, you can also enter if the printer can starat immediately or if the job must wait until all print data have been processed (start print after the last page has been spooled). |
With this command you can delete a client printer by simply entering the printer name in the Details tab. This name is identical with the one you assigned when setting up a printer (see Add printer) in the Details tab. |
Last change on 10.03.2014
