With this command you can obtan a substantial amount of information about a particular file by selecting a file in the Details tab with the right-hand button next to the input field. In addition, you can have an error returned if no file information can be obtained. Do this by selecting the appropriate option. The result or the information is stored in a variable to be specified. For more information in this connection, see chapter Variables. You can query the specific information of the file in a variable by means of the following designations:
|
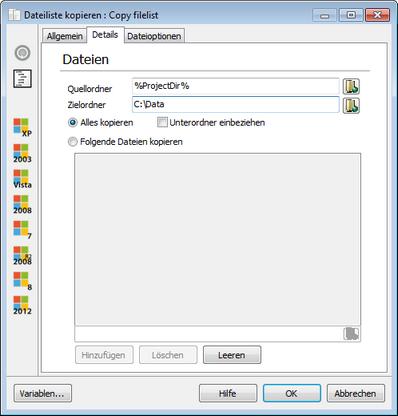
With this command you can copy files from a specific folder into another folder, by entering the folder in which the files to be copied (source directory) in the Details tab. Likewise, you can specify a destination directory in which the files are to be copied. This may also be a shared network folder; this means that the files can also be copied to other computers. In doing so, the source directory is set by default to the directory of the ACMP client (% ProjectDir%).
In addition, you have the option to copy all (All files) or only specific files (Following files) files. If you select the Include subfolders option, the files from any existing subfolders are copied as well.
If you want to copy only certain files (Following files), you can view all files of the selected directory (and of any subdirectories) via the Folder button at the bottom righ corner of the dialog. Select the required files and confirm the selection. Afterwards, these files are displayed in the bottom input bar to be on the safe side. With Add, you can finally select the files. In case of wrong selections, you can clear the list or checkmark and delete individual files.
In the File options tab, you can make various settings in regard to the copying of the files. This allows you to decide if files are always replaced or never. Likewise, you can specify if only older versions are to be replaced, or if confirmation is required before replacing the file.
As an additional option, you can here remove file attributes and overwrite read-only files. Furthermore, you can create a destination directory, if the directory does not exist. With the Create backup file option, overwritten files will be saved with prefix _AAGONBACKUP_ and thus remain available as a backup. |
With this command, you can process, browse and list files and directories step by step. It is similar to the Iterate file repository command in chapter Category file repository.
First specify in the Details tab, if this command is to run through files or directories. Then enter the path to the directory you want to run through in the file mask. If you run through files, also enter a wildcard for the files in addition to the path name, and if subfolders are to include (recursively). (e.g., C:\Aagon\*.* C:\Aagon\*.ini C:\Aagon\status.*
Furthermore, you must specify a variable in which the current file or the current directory which was detected during the iteration. See chapter Variables. If it is necessary, you can also enter the path in the variable. It is recommended that a subordinate If...then command, and an Else command, if necessary, to this command to avoid having to treat all files. |
With this command you can replace an expression in a text file. To do this, select the relevant text file in which you want to replace something in the Details tab by means of the button next to the File name field.
Then enter the old expression as well as the new expression (e.g., test and tex) and select an option, if necessary. In the options you can decide whether all will be replaced or only the first occurrence of the old expression. In addition, you can decide if the case should match. |
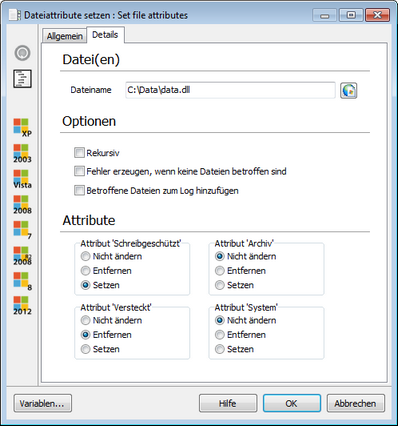
With this command you can change the file attributes of files. Do this by selecting the required file or directory containing files in the Details tab on the button to the right of the input field.
Among the options you can specify whether the files of subfolders in a directory should be included (recursively), whether an error message should appear if no files are affected and if the affected files are to be recorded in a log file.
In the Attributes section, you can specify for each of the four attributes, Read-only, Archive, Hidden, and System, whether the attribute should not be changed, set or deleted. |
This command serves to delete files. Enter this file name in the input field. The *-character here serves as a wildcard for any character string. For example it is possible to delete all files with a certain file extension ("C:\*.tmp"). If no file name is specified (e.g., by entering "C:\"), then an error message is returned.
If the Recursive option is selected in the settings, also files with a matching file name in subdirectories will be deleted. In the same way, the deletion of corresponding files can be enforced with the settigns Delete read-only files or Delete hidden files. In addition, an error can be returned if not matching files are detected. |
With this command you can create a directory by entering the selected directory including its path in the Details tab, or by using the Browse button next to the input field. As a rule, the directory is only created if the entire path to the directory that is to be created is available. If a part of the path does not exist, this option assists in the creation of a directory. With this function, the entire path, including the new directory, will be created. |
With this command you can delete a directory by entering the selected directory including its path in the Details tab, or by using the Browse button next to the input field. You can also delete any existing subdirectories (recursively) or delete read-only and hidden directories. If the specified directory does not exist, an error message may be returned. |
With this command you can specify the size of a file by entering the selected file including its path in the Details tab, or by using the Browse button next to the input field. If this file does not exist, you can have an error message returned via the appropriate option. You also specify a variable in which the result of the query will be saved. For more information on the use of variables, see chapter Variables. |
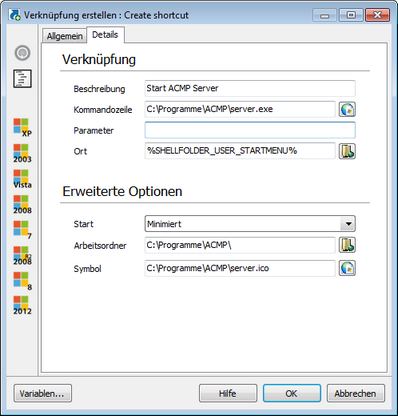
This command serves to create a shortcut by first entering a description in the Details tab; this description serves as the name of the shortcut. Then a command line is entered, which contains the path of the file to be linked. This command line can then be added again with the Browse button next to the input field. Parameters are intended only for executable files to add initialization values to the program. In addition, the path where the link is to be created must be specified. By default, this is the start menu.
In the Advanced options section, you can also specify if the file behind the link is to be started in a regular window, or is to be minimized or maximized. To this end, you can specify the file in which the working directory should be located (normally the directory of the file to be linked). To this end, you can assign an icon to this link. This can be done with the Browse button in the last line, but bear in mind that the icon must have the format *.ico.. |
With this command you can delete any link by entering the description (the name) of the link in Details tab, and by specifying the directory of the shortcut in the Location field. |
With this command, a single file can be copied from one directory to another by entering the file to be copied as well as the destination file or the destination directory in the Details tab. In addition, it is possible to enforce the creation of a directory or path with the appropriate option. Likewise, a file with the same name can be overwritten, and any occurring errors can be ignored. |
With this command, a single file can be moved from one directory to another by entering the file to be moved as well as the destination file or the destination directory in the Details tab. In addition, it is possible to enforce the creation of a directory or path with the appropriate option. Likewise, a file with the same name can be overwritten, and any occurring errors can be ignored. |
This file serves to rename a file by entering the current file and the new file name in the Details tab. However, the new file name may not contain any path information. Any errors can be suppressed via the corresponding option. |
With this command; the MD5 sum of a file can be identified. The MD5 sum of a file is like a fingerprint, it can not be forged. This function allows you to check and verify files by using the Browse button to enter a file; then you enter a variable in which you want to save the hash sum (see Variables). |
With this command you can determine the temporary file of the client simply entering a variable which savest the result in the Details tab (see Variables). |
This command serves to read off a text file line by line (e.g., an .ini file). To do this, enter the required file in the Details tab by using the Browse button. In Options you can cancel the command if the file does not exist or has no content. Then enter a variable in which you can save the read off file line-by-line (see Variables). |
With this command you can define the last point of access for a file or a folder. To do this, specify a file or a directory in the Details tab. With the available option the command can be cancelled if the file does not exist. You still have to enter a variable to save the result (see Variables). |
This command serves to rename a directory by simply entering the current directory in the Details tab. This directory can be selected with the Browse button next to the input field. Below, enter the new name of the directory without specifying a path. |
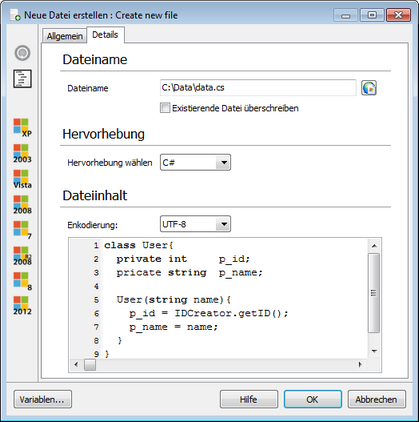
This command serves to create a new file with a specified content by first entering the file type in the Details tab. You can do this in the Highlighter section, where you can change the syntax highlighting. You can now search for and specify all files of the selected type via the Browse button. Optionally, you can choose to overwrite an existing file by placing a checkmark in the corresponding checkbox.
In the bottom text box, you can now specify the contents of the file; as a result, the selected form of highlighting depending on the file type, e.g., HTML tags, are shown in color to make the syntax easier to read. |
Last change on 10.03.2014


