Add a group 
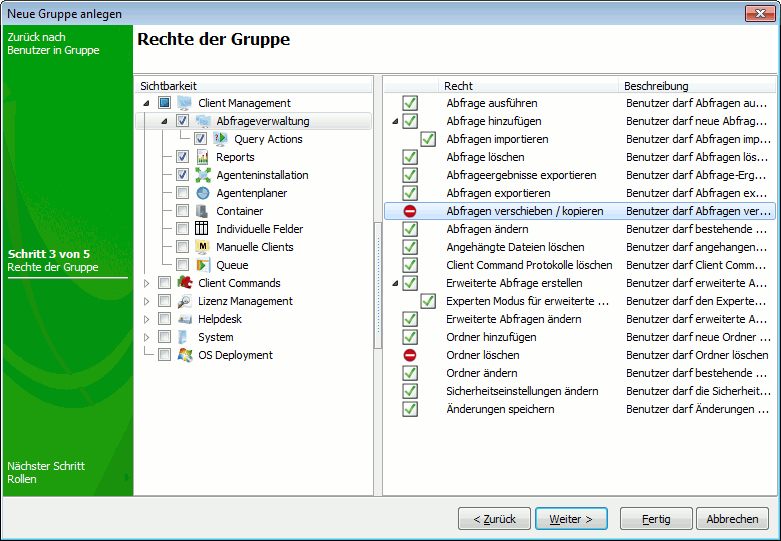
To add a group, click the Add group icon in the quick access toolbar. You can specify the name and description of the group by means of a wizard. The second step now offers you the option to assign one or more users to the group. You can do this by simply ticking the corresponding users from the list. Then enter in a third step the rights of the group. To do this, select on the left side the solutions and functions that should be visible for the group. If you tick one of the functions, you can set the specific rights of different actions in the right section of the dialog box.

Step 3: Group rights
In the fourth step, you can specify if the members of this group shall take the role of a helpdesk employee, provided that the Helpdesk Center solution is installed (see Helpdesk Center). In this way, the members of this group inherit the Helpdesk rolet without having to explicitly install the role for each individual user. This means that a member of this group can record, edit and process tickets as a Helpdesk employee (within the framework of the previously set rights).
The last step servest to match the users of an Active Directory against the ACMP group, which you are currently creating. This makes it possible for users to be managed only on the AD, instead of having to manually enter all users once more in the ACMP. To use this feature sensibly, a login group must be entered in the platform configuration, in which all users who are allowed to access the ACMP are entered (see Login). If you do not want this feature enabled, skip this step.
If this group is now configured so that an AD group is assigned, a user of the AD group is automatically created upon first login to the ACMP and assigned to this group. If the user already exists, he will be assigned to this group if this not already done so. Similarly, users can be matched manually with the function Import all new AD users of the AD access group of user management access to the user management, which means that ACMP users will also be removed from the group if they are no longer part of the assigned AD group. However, ACMP users are not automatically deleted. ACMP users can still be created manually and assigned to the group; in this case they will not be included when the users are matched manually with the function mentioned before.

Step 5: Active Directory group
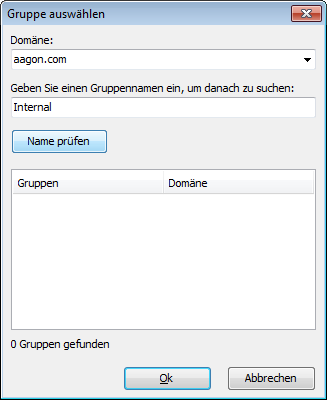
To assign a corresponding AD group to this ACMP group, click Add and select the domain in the new window, in which the group to be assigned is located. Enter a group name or a part of it and click on Check name to show all matching groups. Select the group to be assigned. You can assign multiple AD groups in an ACMP group.
Note: |
To be able to select domains in the dialog, a user must be entered with domain read rights in the ACMP settings (see Login). |
Click Finish to create the group.
Edit group 
To edit a group, ticket it and click on the corresponding icon in the quick access toolbar. This opens the same dialog as for adding a group. The current values are already entered and can be edited as desired.
If you only want to rename a group, you can also do so by right-clicking on the quick access toolbar.
Delete group 
Select a group and click the Delete group icon. Confirm the security prompt to delete the group. The users assigned to the group will not be removed.
Last change on 10.03.2014