A new query can be created by selecting the Management tab, and then click Add query. It opens a dialog that helps you create the query.
First, a name and a description have to be added to the query. The description here is optional, but should still be inserted as it provides quick and direct access to information about the query. Subsequently, the base of the query must be selected. The base determines the available query values.
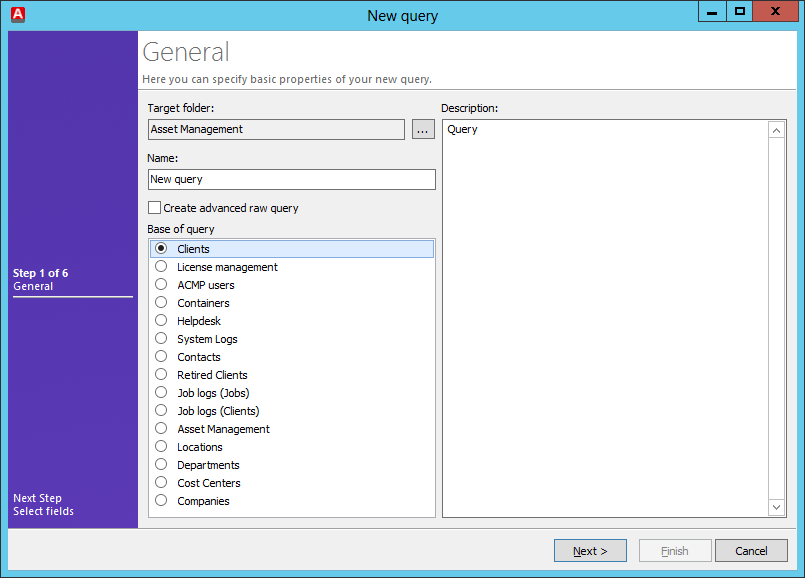
Step 1: General
Use the option Create advanced query to create detailed queries with SQL statements. However, this requires knowledge of the database structure of the ACMP and should not be used without the latter. As of ACMP 4.0, there is also the possibility to create a query without useof a query without using the wizard. You can do this by selecting the expert mode. A query created in this way functions as of ACMP 4.0 just like queries created in the normal way. However, to run client commands on an advanced query, or to be able to open the client details, the result must contain at least the Client ID. Due to the direct input of the SQL code, it is also possible to access the stored procedures of the ACMP database and to run them.
In the next step, you can select the output data. Simply drag the desired values by drag & drop into the right section of the dialog box and position it there. In addition, you can affect the sorting of results by simply checkmarking the appropriate box next to the field. In addition, you have the option to choose the output format of the data in raw form or in uppercase.
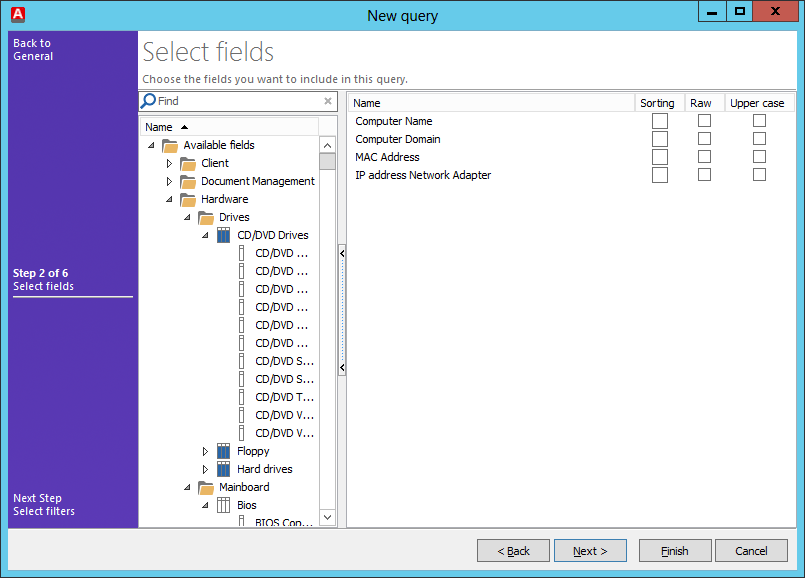
Step 2: Select fields
There is no limit for the number of query values, but for the sake of clarity, not too many values should be selected.
To narrow the results of the query even further, you can narrow the result of the query by using various filters. To this end, drag a value, as in the previous step, on one of the options OR, AND or NOT and then enter their criteria in the following input mask. Multiple values can also be connected, e.g. to realize a condition according to the pattern X OR (Y AND Z). Drag this a condition on an existing AND condition. Both values are set in a composite AND condition. Then drag another value on the AND option; this creates an OR context for the existing values. The values for the filters do not have to be the already selected values. It is therefore possible to display the computer name only, but to filter by IP address.
The following filters are available:
|
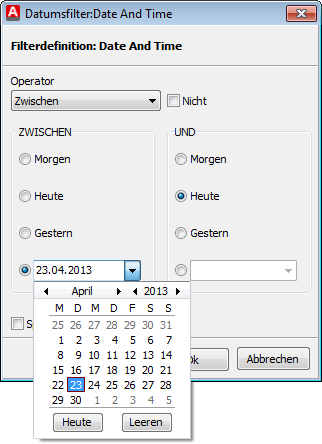
The date filter offers the possibility to filter the results of the query according to a specific date, for which there are various settings. In this case, the value must be a date (e.g. last scan), which can be compared. This value can then be linked before, after or on a specific date. There is also the possibility to define a date range. A calendar facilitates the input of a date. Click the date to accept it. Additionally, you can filter even negate eg to realize a non-And-query. If you don't want to specify the date while you are creating the query, use the option Specify at execution. This means that you will only be asked for a date when you start the query. |
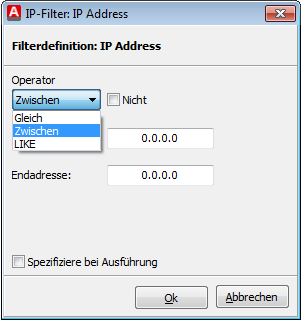
In the IP address filter, you can filter the query results based on the IP of the clients to obtain, e.g. data for one department only. You are able to specify an entire IP address, an IP address range or use a wildcard (LIKE). You can use the following placeholder characters for the wildcard: % - several random characters _ - any random character It is possible to negate the filter or to make an input during the execution of the query. |
|
|
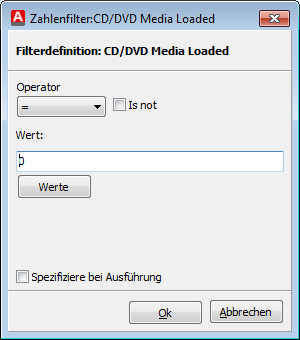
The number filters can be used, e.g., to obtain results form machines with several drives. You can choose from all common mathematical operators. As value you can enter any number. Click on the Button Values to obtain possible values that can be accepted by the query. This button is not always available. It is possible to negate the filter or to make an input during the execution of the query. |
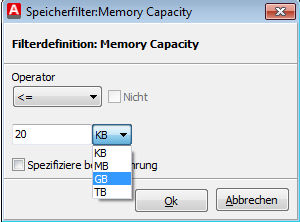
With the memory filter, you can make your results dependent on the memory space of a machine or a medium. You can choose from all common mathematical operators. As value you can enter any number. Then select the correct unit (KB, MB or GB). It is possible to negate the filter or to make an input during the execution of the query. |
|
|
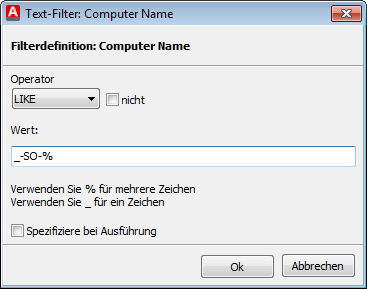
This filter is used for filtering based on strings. The standard mathematical operators are available. You can enter any string of characters, or a wildcard with the following placeholders as filter value: % - several random characters _ - any random character Click on the button Values, to obtain possible values that can be accepted by the query. This button is not always available. It is possible to negate the filter or to make an input during the execution of the query. |
If you select the query fields to reflect a 1: n relationship, a step now follows with which you can influence the alignment of the result. This is the case when fields are selected, which can assign several results to a client, e.g. the number of printers or processors. If the result is aligned according to clients, the clients will be listed individually, and the multiple results will then be displayed in a subform. If you choose Network card for alignment, the printers are listed, and the clients in a subform.
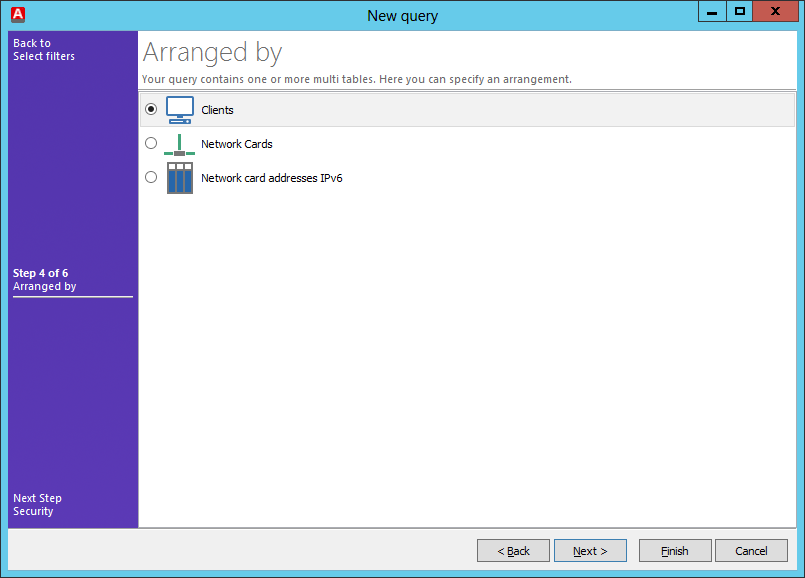
Step 4: Alignment
In the security settings, you can specify which user or group shall have certain rights in this query. To assign a right to a group or user, you first have to add them to the selection. You can select the rights Edit, Execute and View. The right Execute also includes the right to view the results of the query. If the option View is deactivated, the query will not be visible for the user or the group. In regard to rights, you can choose between the options Allow, Prohibit and Neutral. in this case, a Prohibition has the highest priority. For example, if you do prohibit a group to Execute while you explicitly allow a single user to do so, the user will nevertheless be unable to execute the query. A neutral right is always based on other assigned rights. For example, if a user is granted a right to perform a certain action through a group, and if such user is granted a neutral right, he shall be granted this right through the groups.
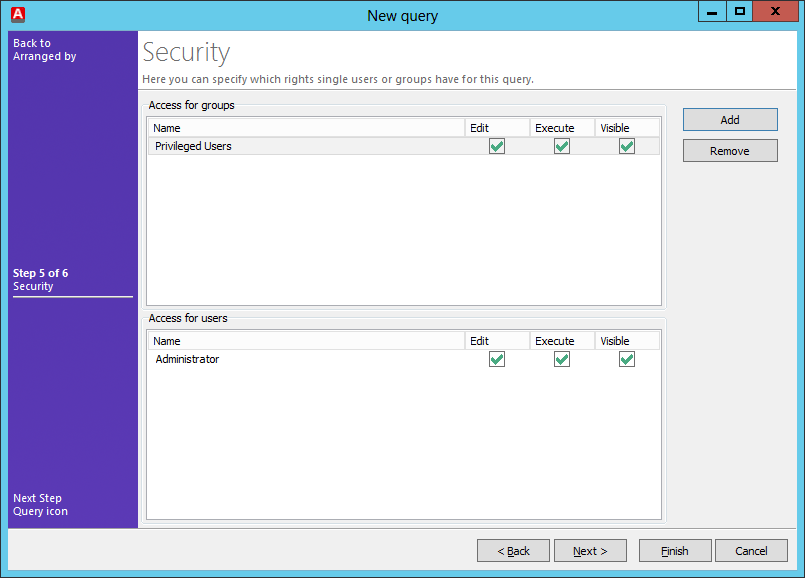
Step 4: Safety
Finally, there is still the option to assign a suitable icon for your query. In addition to the available icons, you can use your own icons. The icons must be in *.bmp or in *.ico format and should not exceed the size of 16x16 pixels, as otherwise a correspondingly large portion of the original file will be used.
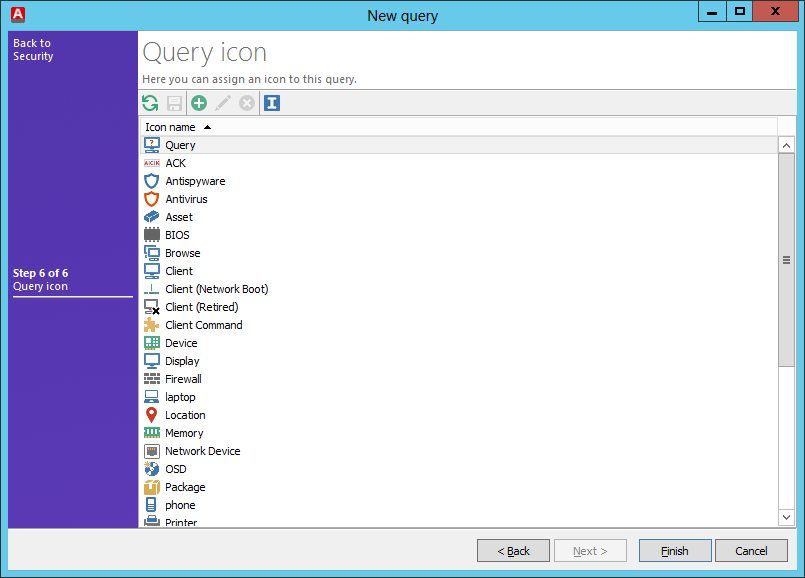
Step 5: Query icon
Close the dialog by clicking on Finish. The query has now been added to the query management.
Last change on 13.04.2017
